Glasgow, Bothwell, Hamilton and Coatbridge Railway
Introduction
This line is closed. The line was also known as the North British Railway's (and later London and North Eastern Railway's) Hamilton Branch.
The passenger carrying parts of the line were double track and colliery branches single track.
Why built
With this line, the North British Railway entered territory which had been served by the Caledonian Railway. Its initial backers, however, were Coatbridge and Glasgow iron-masters seeking an independent line to carry coal from Hamilton and Bothwell to their works.
Promoted by William Smith Dixon (Calder Iron Works, Govan Iron Works), William Baird and Company (Baird and Alexander Whitelaw of the Gartsherrie Iron Works by Coatbridge) and William Beardmore (Senior) (Parkhead Forge by Shettleston).
In the 1879 the Chairman was A O Ewing and directrors J Addie, J Alexander, J Beardman, J Hendrie and W Laird. Secretary H Lamond.
Architecture
Stations were quite plain. The signal boxes were by McAlpine McAlpine who also built Burnbank Station.
Service
The line was closed to passengers, except miners' trains, during the Great War.
Trains ran initially from College [1st], later from Hyndland [1st] and Clydebank Central, via Shettleston to Hamilton [NB] . Another route was via Blairhall and Coatbridge Central [NB] to Hamilton [NB] .


Dates
Portions of line and locations
This line is divided into a number of portions.
Shettleston to Bothwell
Double track passenger and goods line from Shettleston Junction to Bothwell Junction.
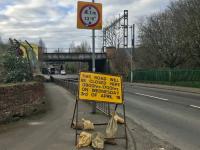
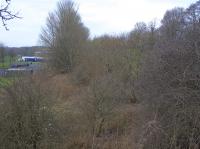
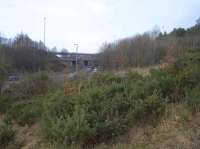
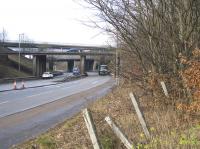
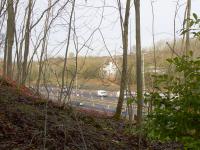
This junction between the North British Railway's Glasgow-Coatbridge line and the Hamilton Branch opened in 1877 and closed on 04/10/1965, with the closure of the line to Mount Vernon Colliery. There was a small set of sidings on the Hamilton branch and a Glasgow bound loop.
...
See also
Glasgow and Coatbridge Branch (North British Railway)

Colin McDonald 20/03/2017
...
Colin McDonald 29/03/2019
Colin McDonald 17/03/2017
Colin McDonald 20/03/2017
There was a set of sidings on either side of the Hamilton branch south of Shettleston Junction controlled by this signal box. The box was on the west side of the line.
...
This coal yard was roughly half a mile closer to Shettleston Junction than the nearby Mount Vernon North passenger station. It was served from the Hamilton end. ...
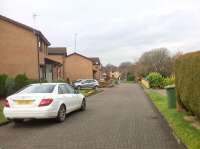
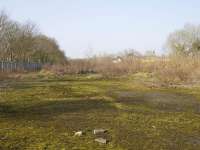
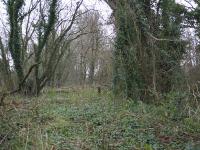
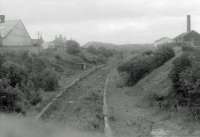
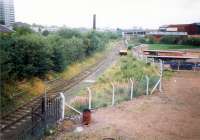
More detailsThis was a two platform station on the Hamilton branch from Shettleston. The station was on an embankment. Platforms were built in timber.
...
Colin McDonald 13/11/2021
Colin McDonald 10/03/2017
Colin McDonald 15/02/2017
Colin McDonald 15/02/2017
This colliery opened around the 1870s and closed around the 1920. It was served by both the North British Railway (Hamilton Branch) and Caledonian Railway (Rutherglen and Coatbridge line). ...
More detailsSee also
Rutherglen and Coatbridge Branch (Caledonian Railway)
This colliery and brickworks was on a short branch which ran north from the Shettleston-Bothwell line at Mount Vernon North. Barrachie signal box closed in 1929.
...
This colliery was location between the Rutherglen and Coatbridge Branch (Caledonian Railway) and the North British Railway's Glasgow, Bothwell, Hamilton and Coatbridge Railway Hamilton branch at Mount Vernon.
...
See also
Rutherglen and Coatbridge Branch (Caledonian Railway)
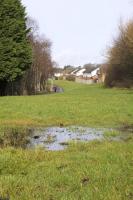
This was a two platform station of which very little remains.
...
Colin McDonald 14/02/2017
Colin McDonald 14/02/2017
Colin McDonald 14/02/2017
Colin McDonald 19/05/2018
This colliery was located to the east of Broomhouse station. Rail access was from the east. ...
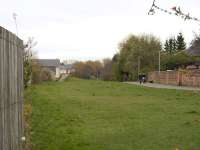
More detailsThis two platform short lived halt served Glasgow's zoo, Calderpark Zoo. Immediately to the east was the North Calder Viaduct NB. Small station buildings were provided.
...
Colin McDonald 20/02/2017
Colin McDonald 20/02/2017
Colin McDonald 20/02/2017
Colin McDonald 20/02/2017
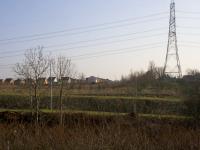
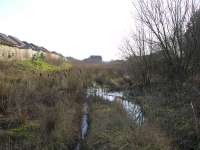
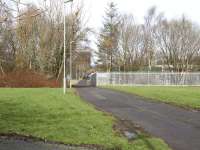
This viaduct over the North Calder also passed over Roundknowe Road at the same location. To the west was the short lived Calderpark Halt and to the east the sidings for the Bredisholm Branch and Clydeside Colliery, followed by Maryville station. ...
More details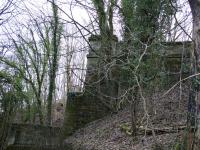
Colin McDonald 09/03/2017
Colin McDonald 09/03/2017
Colin McDonald 20/02/2017
Colin McDonald 15/02/2017
This was an exchange yard to the south west of Bredisholm Collieries Pit No 1 where a mineral branch of the Glasgow, Bothwell, Hamilton and Coatbridge Railway, running from Maryville, met the Drumpeller Railway mineral line.
...
See also
Drumpeller Railway
This was a two platform station serving a small community and the neighbouring collieries at Clydeside and Bredisholm.
...
Colin McDonald 15/02/2017
Colin McDonald 15/02/2017
Colin McDonald 15/02/2017
This was a two platform station on the North British Railway's Hamilton branch. The next station west was Maryville and east Uddingston East, from which signalling was controlled. There were no goods facilities.
...

Colin McDonald 24/02/2017
Colin McDonald 24/02/2017
Colin McDonald 15/02/2017
Colin McDonald 15/02/2017
This colliery was served by both the Caledonian Railway (from a siding accessed from the Uddingston station direction) and North British Railway (from a siding accessed from the Uddingston West station direction. The NBR approach was a later addition added after the opening of the Glasgow, Bothwell, Hamilton and Coatbridge Railway. ...
More detailsThis station was just to the south of the cross over Uddingston Junction of the Caledonian Railway. The station had a goods yard and two platforms. Being one of the larger stations on the line, and the original NB Uddingston station, it had a station building on the northbound platform and shelter on the southbound. The signal box (1900) was located at the north end of the station. Closed ...
More details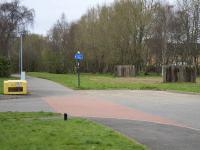
Colin McDonald 24/02/2017
Colin McDonald 29/03/2017
Colin McDonald 29/03/2017
The gas works opened after the Glasgow, Bothwell, Hamilton and Coatbridge Railway and was served by a siding from the yard at Bothwell Junction.
...
This was the junction between the lines to Shettleston (running north west) and Coatbridge Central [NB] (running north east) with the line continuing south to Hamilton [NBR] and Blantyre Pits.
...
Colin McDonald 26/03/2017
Colin McDonald 29/03/2017
Colin McDonald 24/02/2017
Bothwell to Hamilton
Double track passenger and goods line from Bothwell Junction to Hamilton [NB] .
This was the junction between the lines to Shettleston (running north west) and Coatbridge Central [NB] (running north east) with the line continuing south to Hamilton [NBR] and Blantyre Pits.
...
Colin McDonald 26/03/2017
Colin McDonald 29/03/2017
Colin McDonald 24/02/2017
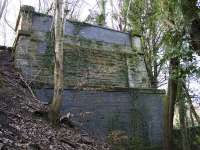
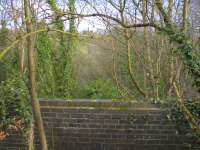
This was a two platform station on the North British Railway's Hamilton Branch. It was one of the more substantial stations on the line having a station building on the northbound platform and shelter on the southbound. It was located in a shallow cutting with a retaining wall on the southbound platform side.
...
Colin McDonald 15/02/2017
Colin McDonald 15/03/2017
Colin McDonald 15/03/2017
Colin McDonald 15/03/2017
This colliery was located immediately west of Bothwell [North British] station. Sidings south of the station allowed departures from the colliery to head north to Bothwell Junction to take either the Shettleston or Coatbridge routes.
...
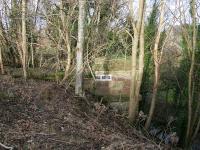
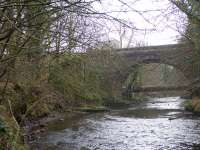
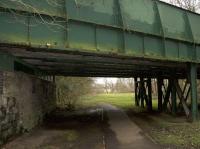
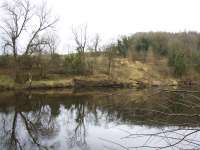
This was a seven span 727 ft double track viaduct over the River Clyde with metalwork built by the Dalmarnock Iron Works. This viaduct on the North British Railway's Hamilton branch crossed the River Clyde just south of Bothwell and east of Blantyre. The condition of the viaduct led to the line being cut back to Bothwell [North British], just to the north, in 1952. Formerly the line ...
More details
Colin McDonald 15/03/2017
Colin McDonald 15/03/2017
Colin McDonald 15/03/2017
This signal box was immediately south of Craighead Viaduct and just north of the Craighead Colliery Pits Nos 1 and 2 sidings, which were on the west side of the line and approached from the north.
...
This colliery was served by both the North British Railway's Hamilton branch from Craighead Signal Box and the Caledonian Railway's Hamilton branch from Strathaven Junction Yard.
...
This junction on the North British Railway's Hamilton branch was between the line running south and east to Hamilton [NBR] and the Blantyre Branch to Blantyre Pits. To the north the line ran over the Craighead Viaduct to Bothwell [North British].
...
This shed was located alongside Blantyre Junction [NBR]. It may also have been known by that name. This was a three road shed on the east side of the line, with track running south to join the line to Hamilton [NBR].
...
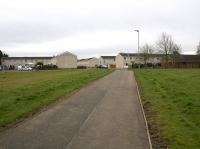
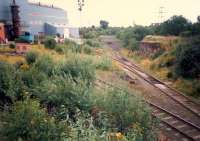
This was a two platform station south of Blantyre Junction [NBR] and north of Burnbank Junction (Burnbank Signal Box. This had a small station building on the northbound platform and a shelter on the southbound. It was located in a cutting.
...
Ewan Crawford //2000
John Robin 02/07/1963
This signal box was south of Burnbank station. It controlled access to the North British Railway's branch to Earnock Colliery Pits Nos 1, 2 and 3 (also served by a Caledonian Railway line from their Hamilton branch) and Wellhall Colliery. Both colliery lines joined facing Bothwell [North British]. Further east was Peacock Cross station.
...
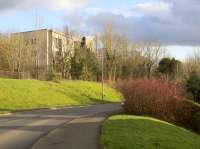
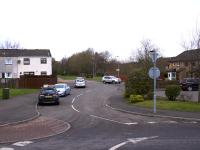
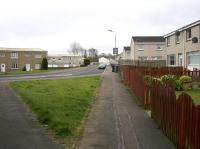
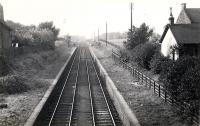
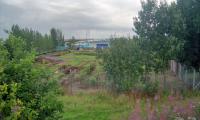
This was a two platform station. The main building was on the westbound platform with a shelter on the eastbound. There was no goods yard, but there were a considerable number of mineral lines nearby. The station was in the west of Hamilton.
...

Ewan Crawford //
Both the Caledonian Railway and North British Railway served this colliery from lines built in the late 1870s. ...
More detailsSee also
Cadzow Colliery Branch (Caledonian Railway)
The Clyde Steel and Engineering Works, the foundry of Archibald Baird & Son, was immediately east of Peacock Cross station on the Glasgow, Bothwell, Hamilton and Coatbridge Railway and was served by a siding. Unusually for the area, the Caledonian Railway had no siding.
...
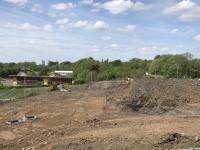
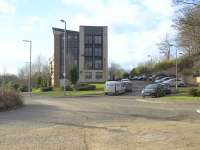
This was a terminus with two platforms to the north of the competing Caledonian Railway's Hamilton Central. The northern of the two platforms was aligned a little further west. The main platform had a small trainshed enclosing the platform line.alongside the station building. The trainshed was later removed. The station drive ran onto the east end of the island platform. The lines serving ...
More details
Gordon Steel //1896
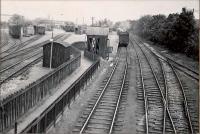
G H Robin collection by courtesy of the Mitchell Library, Glasgow 04/06/1949

G H Robin collection by courtesy of the Mitchell Library, Glasgow 06/09/1952
Bothwell to Whifflet
Double track passenger and goods line from Bothwell Junction to Whifflet Central Junction. There was a workmans' platform at Bothwell Park.
This was the junction between the lines to Shettleston (running north west) and Coatbridge Central [NB] (running north east) with the line continuing south to Hamilton [NBR] and Blantyre Pits.
...
Colin McDonald 26/03/2017
Colin McDonald 29/03/2017
Colin McDonald 24/02/2017
This box controlled access to Bothwell Park Colliery Pits No 1 and 2 (also served by the Caledonian Railway) and the Hamilton Palace Colliery Railway (Caledonian Railway and North British Railway Joint) line.
...
This colliery was served by both the North British Railway (approaching from the west) and Caledonian Railway (approaching from the south east). ...
More detailsSee also
Clydesdale Junction Railway
This was a workers' halt for the near Bothwell Park Colliery. The halt is not shown on OS maps. It was probably located just to the east of the sidings for the colliery. ...
More detailsA line ran south from the Bothwell Junction to Whifflet [NB] line to East Parkhead Colliery Pits Nos 1 and 2. This colliery was also served by the Caledonian Railway from the south.
...
This was a two platform station. A small goods yard was on the west side of the station, approached from the north. There was a signalbox, Bellshill North, to the north of the station. Around 1900 a branch opened to Hattonrig Colliery Pits Nos 3 and 4 with approach from the Bothwell direction.
...
Ewan Crawford //2000
At this junction the line south to Bothwell Junction and west to Rosehall Colliery met and ran north to Whifflet Central Junction.
...
At this junction a line west to Rosehall Colliery met the line south to Bothwell Junction before running north to Whifflet Central Junction.
...
This signal box controlled access from the Whifflet Central Junction to Bothwell Junction line to the Carnbroe Iron Works (to the east) and Rosehall Colliery (west) via a connection to the Rosehall Railway.
...
To the east was a large yard for the Calder Iron Works on the line to Faskine. The yard was on the original alignment of the Monkland and Kirkintilloch Railway, the railway being deviated to the north. The far end of the deviation was at Calder Iron Works Signal Box [NBR].
...
See also
Monkland and Kirkintilloch Railway
Ewan Crawford //1987
Ewan Crawford 26/09/2009
Ewan Crawford //1987
Ewan Crawford //1998
Blantyre Branch
Single track goods only line from Blantyre Junction to the Blantyre pits. It is sometimes known as the Auchinraith Branch, although strictly speaking this was a branch from this line.
This junction on the North British Railway's Hamilton branch was between the line running south and east to Hamilton [NBR] and the Blantyre Branch to Blantyre Pits. To the north the line ran over the Craighead Viaduct to Bothwell [North British].
...
This siding was a short distance west of Blantyre Junction [NBR] and not far east of Auchinraith Junction on the North British Railway's Blantyre branch.
...
This junction on the North British Railway's Blantyre branch gave access to Auchinraith Colliery Pits Nos 1 and 2. To the east was Birdsfield Siding and the connection to the main NBR Hamilton branch at Blantyre Junction [NBR].
...
This junction on the North British Railway's Blantyre branch gave access to Auchinraith Colliery Pits Nos 1 and 2. To the east was Birdsfield Siding and the connection to the main NBR Hamilton branch at Blantyre Junction [NBR].
...
See also
Hamilton and Strathaven Railway
This was the western end of the North British Railway's Blantyre branch (1878) from Blantyre Junction [NBR]. The Blantyre pits were already served by the Hamilton and Strathaven Railway. This was a link to the existing lines with a loop and signalling. The opening date of the box is uncertain. Closure was in 1932 after which the branch was not signalled. The west end at Blantyre Pits ...
More detailsBooks
 A Regional History of the Railways of Great Britain: Scotland - The Lowlands and the Borders v. 6 (Regional railway history series) |  Forgotten Railways: Scotland |
