North Monkland Railway
Introduction
This line is closed. This was a goods and minerals only line, nominally independent of the North British Railway, serving a large number of collieries. Many of the collieries were closed by 1910, leading to closure of the eastern part of the line, from Greengairs Siding to North Monkland Junction in 1921 (officially by the London and North Eastern Railway in 1923).


Dates
| / /1871 | North Monkland Railway Act receives Royal assent. |
| / /1872 | North Monkland Railway Line opened, fully open by 1878. |
| / /1888 | North Monkland Railway
North British Railway North Monkland Railway absorbed by North British Railway. |
| / /1923 | North Monkland Railway North Monkland Junction (excluded) to Greengairs Siding (excluded) closed. |
| 01/09/1949 | North Monkland Railway
Dykehead Branch Extension (Monkland Railways)
Dykehead Branch (Ballochney Railway)
Ballochney Railway Dykehead branch closed. Closed from Greengairs Siding to Dykehead Junction. |
| / /1954 | North Monkland Railway Rigghead Siding (excluded) to Greengairs Siding closed. |
| / /1964 | North Monkland Railway Sun Tube Steelworks (excluded) to Rigghead Siding closed. |
| 18/08/1971 | North Monkland Railway Kipps Junction to Sun Tube Steelworks closed. |
Route described
This line ran through the northern part of the Monkland coalfield from Kipps Junction to North Monkland Junction, Slamannan.
The line was without signal boxes, although some apparent signals are shown on OS maps.
Portions of line and locations
This line is divided into a number of portions.
Kipps Junction to North Monkland Junction
The 'main line' ran from Kipps Junction, heading at first west, then north, and then turning to the east, to North Monkland Junction.
This was a junction which grew to serve numerous lines and yards.
...
See also
Ballochney Railway
Monkland and Kirkintilloch Railway
This brick works made use of the Kipps Quarry, immediately to the north. It was served by a branch from a small yard on the North Monkland Railway close to Kipps Junction.
...
This tube works was established in the 1880s by the Clyde Tube Works. It was approached from a siding from the north from the North Monkland Railway. This siding was later looped with a new connection being made closer to Kipps Junction allowing access to the south over a weighbridge.
...
This quarry was north of Kipps Junction. It was served by sidings in either side of the North Monkland Railway. ...
More detailsThis colliery was north of Kipps Junction and railway served, a siding running from the west side of the North Monkland Railway north into the colliery.
...
This colliery was north of Braidenhill Colliery No 1. Like No1 it was railway served from the North Monkland Railway. A siding ran from the west side of the line north into the colliery.
...
Douglas Blades 18/09/2019
This rail served tip was to the north of Braidenhill Colliery No 2 and south of Ryding Siding. The layout of the sidings here changed over the years but the general pattern was that the sidings came from the west side of the North Monkland Railway and ran south west to the tipping area.
...
This siding was north of Braidenhill Tip and south of Brackenhirst Junction. It was on the east side of the North Monkland Railway line, served from the north.
...
This colliery was served by a tramway running west to Ryding Siding on the North Monkland Railway. ...
More detailsThis quarry was directly north of Ryding Siding and south of Brackenhirst Junction.
...
This junction on the North Monkland Railway gave access to a series of zig zag lines serving Brackenhirst Quarry, Brackenhirst Tip and, later, Brackenhirst Fireclay Works.
...
This was a siding on the North Monkland Railway, north of Brackenhirst Junction and west of Rigghead Siding.
...
A short line from the North Monkland Railway, running from a westbound junction on the north side of the line, served Rigg Colliery Pit No 6 and, further east a loading point for Rigg Colliery Pit No 5. Rigg Colliery Pit No 5 was connected to the loading point by means of a tramway running north. ...
More detailsA short line from the North Monkland Railway, running from a westbound junction on the north side of the line, served Rigg Colliery Pit No 6 and, further east a loading point for Rigg Colliery Pit No 5. Rigg Colliery Pit No 5 was connected to the loading point by means of a tramway running north. ...
More detailsThis public siding was on the North Monkland Railway. There was a passing loop and a siding from the eastbound loop, reached by reversal.
...
This junction gave access to the Drumshangie Colliery branch from the North Monkland Railway. The branch ran to the south from the main line and was approached from the east. The branch, and colliery, was closed by 1910.
...
This colliery was served by a short branch from the North Monkland Railway. This branch was on the north side of the line and approach was from the east.
...
This was a public siding.
...
This colliery was to the immediate south of Greengairs Siding on the North Monkland Railway.
...
This pit was served by two railways, both ultimately to be owned by the North British Railway.
...
This colliery was served by a siding from the North Monkland Railway. The siding was on the south side of the line, served from the east.
...
Ewan Crawford //2001
This colliery was served by a tramway which ran south to the North Monkland Railway. There were several looped lines on the North Monkland.
...
The Broadrigg Colliery railways connected to the North Monkland Railway close to Roughrigg Colliery Pit No 11. A branch, on the south side of the line and approached from the west, ran south east to a reversing spur by Roughrigg Colliery Pit No 3. By reversal Roughrigg Colliery Pit No 5 could be reached.
...
This junction ran from a loop on the North Monkland Railway. The Broadrigg colliery line ran north west from the junction, access was from the east. This split running to both Broadrigg Colliery Pit No 3 and Broadrigg Colliery Pit No 6. Once on the branch from the junction a reversal gave access to Broadrigg Colliery Pit No 4 and Broadrigg Engine Shed.
...
This pit was served from the North Monkland Railway by a siding which ran from the north side of the line, approached from the east. The connection was not far west of North Monkland Junction.
...
Douglas Blades 26/07/2019
This was the junction between the Slamannan Railway of 1840 and the North Monkland Railway of 1878, a partly independent line of North British Railway origins.
...
See also
Slamannan Railway
Brackenhirst Branch
This branch reached various quarries at Brackenhirst and ran from Brackenhirst Junction.
This junction on the North Monkland Railway gave access to a series of zig zag lines serving Brackenhirst Quarry, Brackenhirst Tip and, later, Brackenhirst Fireclay Works.
...
This tip was served by sidings from Brackenhirst Junction on the North Monkland Railway.
...
This fireclay works was at the south end of the Brackenhirst Quarry and rail served from Brackenhirst Junction, the approach line turning through nearly 180 degrees to reach the works. ...
More detailsThis quarry was served by a siding from Brackenhirst Junction on the North Monkland Railway. The siding turned through almost 180 degree on its way to the quarry. To the south was Brackenhirst Works (Fireclay) and further south Brackenhirst Tip.
...
This quarry was west of Brackenhirst Quarry and was reached by a zig zag line from the line from Brackenhirst Junction on the North Monkland Railway. ...
More details
Drumshangie Colliery Branch
This junction gave access to the Drumshangie Colliery branch from the North Monkland Railway. The branch ran to the south from the main line and was approached from the east. The branch, and colliery, was closed by 1910.
...
This pit was not far south of Drumshangie Junction on the branch to the Drumshangie Colliery from the North Monkland Railway. It was on the east side of the branch, served from the north. The branch divided here with lines running south west to Drumshangie Colliery Pit No 9 and the other ran south east to Drumshangie Colliery Pit No 3 and, beyond, Drumshangie Colliery Pit No 1. ...
More detailsThis pit was close to where point where the south east and south west forks, of the branch to the Drumshangie Colliery from Drumshangie Junction on the North Monkland Railway, divided.
...
This pit was at the end of the south east fork of the branch to the Drumshangie Colliery from Drumshangie Junction on the North Monkland Railway.
...
This pit was at the end of the south west fork of the branch to the Drumshangie Colliery from Drumshangie Junction on the North Monkland Railway.
...
Roughrigg Colliery Branch
The Broadrigg Colliery railways connected to the North Monkland Railway close to Roughrigg Colliery Pit No 11. A branch, on the south side of the line and approached from the west, ran south east to a reversing spur by Roughrigg Colliery Pit No 3. By reversal Roughrigg Colliery Pit No 5 could be reached.
...
This pit was located alongside the North Monkland Railway close to Roughrigg Colliery Junction where the Roughrigg Colliery lines connected with the North Monkland. The pit was approached from the south east, from the colliery lines. ...
More details
Broadrigg Colliery Branch
This junction ran from a loop on the North Monkland Railway. The Broadrigg colliery line ran north west from the junction, access was from the east. This split running to both Broadrigg Colliery Pit No 3 and Broadrigg Colliery Pit No 6. Once on the branch from the junction a reversal gave access to Broadrigg Colliery Pit No 4 and Broadrigg Engine Shed.
...
This was the largest of the Broadrigg Colliery pits. It was approached from the south east by a branch from Broadrigg Colliery Junction on the North Monkland Railway.
...
This pit was served by a siding from the line from Broadrigg Colliery Junction to Broadrigg Colliery Pit No 3.
...
This shed was close to Broadrigg Colliery Junction.
...
This pit was closed before 1898. It was reached by reversal from the branch, from the North Monkland Railway to Broadrigg Colliery Pit No 3 and Broadrigg Colliery Pit No 6. ...
More detailsBooks
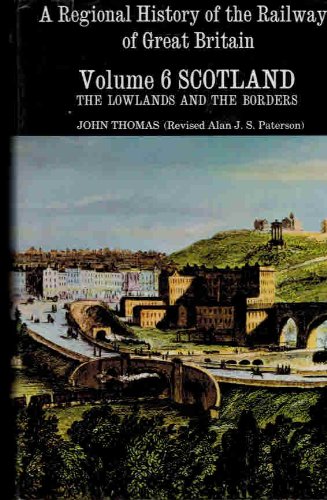 A Regional History of the Railways of Great Britain: Scotland - The Lowlands and the Borders v. 6 (Regional railway history series) | The Monkland & Kirkintilloch and associated railways |
