Woolley Tunnel

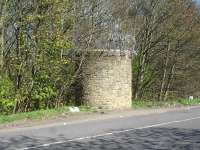
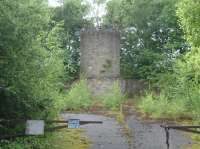
Number 6 air shaft, located over the upside bore of Woolley Tunnel, is located just off Bramley Lane close to the top of the embankment alongside the M1 entry slip road from Woolley Edge southbound services. Of note is the bolt-on access panel and the fair degree of distortion in the brickwork around the base section. A stone built air shaft, number 5, over the downside bore is sited at a lower level on the opposite side of Bramley Lane alongside the exit from the lorry parking area for the southbound services. See image 55837. A further stone built air shaft, Number 2, again for the upside bore, sits alongside the M1 entry slip road from the northbound services, whilst a further two brick air shafts, numbers 7 & 8, have been located further south close to a pathway through the woodland running from this shaft, but I only noted number 8 when returning up some steps as it was well concealed by the extensive growth. Number 7 is also visible from the adjacent farmers field.
Location: Woolley Tunnel
Original line: Sheffield, Rotherham, Barnsley, Wakefield, Huddersfield and Goole Railway
Photographer: David Pesterfield
Contact photographer: David Pesterfield
Date: 31/03/2014
Image number: 46840
Tags: TunnelOther photographs of Woolley Tunnel on RailScot
 |  |
